A Step-by-Step Guide to Fixing a Leaky Faucet
Have you ever experienced the annoyance of a leaky faucet? Not only can it be irritating to listen to that constant drip-drip-drip, but it can also waste a significant amount of water over time. In this guide, we’ll walk you through the steps to fix a leaky faucet, helping you save water and money in the process.
Assessing the Faucet Leak:
Before diving into the repair process, it’s essential to identify the type of faucet you have and determine the severity of the leak. There are four main types of faucets: compression, ball, cartridge, and ceramic disk. Additionally, the severity of the leak can range from a simple drip to a steady stream of water or even leaking from the base.
Gathering the Necessary Tools:
To successfully repair a leaky faucet, you’ll need a few basic tools. Make sure you have the following items on hand:
1. Adjustable wrench
2. Screwdrivers (Phillips and flathead)
3. Pliers
4. Replacement parts (if required)
5. Plumber’s tape
6. Cleaning materials (such as vinegar, cloth, and toothbrush)
Step-by-Step Repair Process:
Now that you have the tools ready, let’s jump into the step-by-step repair process:
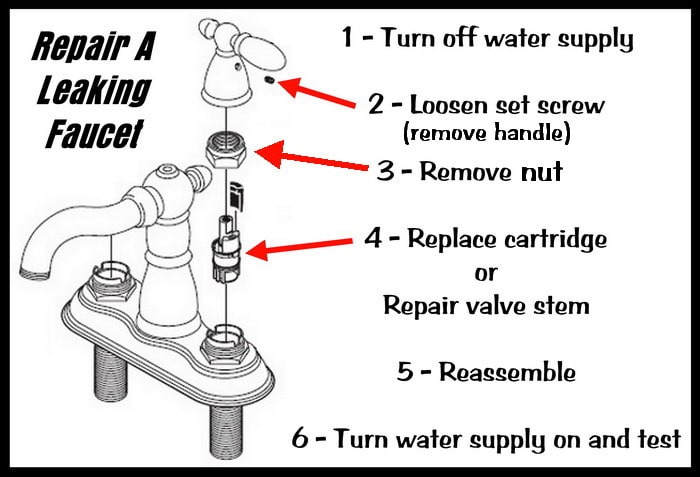
1. Shut off the water supply:
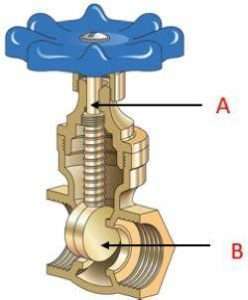
Locate the shut-off valve beneath the sink or near the water meter. Turn off the water supply by rotating the valve clockwise.
2. Disassemble the faucet:
Remove any decorative caps or handles using a flathead screwdriver. Unscrew the handle to expose the valve mechanism.
3. Identify the problem:
Depending on the type of faucet, inspect the specific components for issues:
– Compression faucet: Examine the rubber washers and O-rings for wear or damage.
– Ball faucet: Check the ball, cam, and rubber seals for any signs of deterioration.
– Cartridge faucet: Inspect the cartridge and seals for wear or buildup.
– Ceramic disk faucet: Clean or replace the ceramic disks if they are cracked or clogged with debris.
4. Replace faulty parts:
Based on your assessment, replace the necessary parts:
– Compression faucet: Replace the worn-out rubber washers and O-rings.
– Ball faucet: Install a new ball, cam, and rubber seals.
– Cartridge faucet: Replace the cartridge and seals.
– Ceramic disk faucet: Clean or replace the ceramic disks if necessary.
5. Reassemble and test the faucet:
Once the faulty parts have been replaced, reassemble the faucet in the reverse order of disassembly. Tighten everything securely, but avoid over-tightening. Turn on the water supply and test the faucet for any leaks. Adjust the handle if needed to ensure smooth operation.
Preventative Maintenance Tips:
To prevent future leaks, consider these maintenance tips:
1. Regularly clean and remove mineral deposits from faucet aerators to maintain proper water flow.
2. Check for worn-out parts and promptly replace them to prevent leaks from occurring.
3. Use gentle force when operating the faucet to avoid damaging the internal components.
There are several different types of faucets commonly found in households. Each type operates in a slightly different way and may require specific repair techniques.
Here are the main types of faucets:
1. Compression Faucet:
– This is the most traditional type of faucet.
– It has separate hot and cold water handles.
– When the handles are turned, the compression washers are pressed against the valve seat, stopping the flow of water.
– Commonly found in older homes.
2. Ball Faucet:
– A ball faucet has a single handle that controls both the temperature and the flow of water.
– Inside the faucet, there is a ball with chambers and slots that control the water flow and mixing.
– It is known for its durability and is often found in kitchens.
3. Cartridge Faucet:
– Cartridge faucets have a cartridge mechanism that controls the flow and temperature of water.
– They can have either a single handle or dual handles.
– The cartridge can be replaced if it becomes worn or damaged.
– Cartridge faucets are commonly found in bathrooms.
4. Ceramic Disk Faucet:
– Ceramic disk faucets use ceramic disks to control the water flow and temperature.
– The disks move against each other to open and close the water pathways.
– They are known for their durability and smooth operation.
– Ceramic disk faucets are often found in upscale bathrooms and kitchens.
5. Touchless Faucet:
– Touchless faucets are becoming increasingly popular due to their convenience and hygiene benefits.
– They have sensors that detect motion, allowing the water to turn on and off automatically.
– Touchless faucets are commonly found in public restrooms and high-end homes.
6. Wall-Mounted Faucet:
– Wall-mounted faucets are installed on the wall above the sink or countertop.
– They can have different mechanisms such as compression, cartridge, or ceramic disk.
– Wall-mounted faucets offer a sleek and modern look to the bathroom or kitchen.
It’s important to note that within each type, there can be variations and different brands with their own unique features. Understanding the type of faucet you have is crucial when it comes to troubleshooting and repair.
Certainly! Here are 10 frequently asked questions about fixing a leaky faucet, along with their answers:
1. Q: Why is my faucet leaking?
A: Faucet leaks are commonly caused by worn-out or damaged internal parts, such as the washers, O-rings, or cartridge. Sediment buildup or improper installation can also contribute to leaks.
2. Q: How can I determine the type of faucet I have?
A: Faucets generally fall into four categories: compression, ball, cartridge, or ceramic disk. Each type has unique characteristics, so identifying your faucet’s type is crucial for obtaining the correct repair parts.
3. Q: Can I fix a leaky faucet myself?
A: Yes, many faucet leaks can be fixed as a DIY project. However, it’s important to have basic plumbing knowledge and the right tools. If you’re unsure or uncomfortable, it’s best to consult a professional plumber.
4. Q: What tools do I need to fix a leaky faucet?
A: The tools required may vary depending on the faucet type, but common tools include an adjustable wrench, screwdrivers, pliers, Allen wrenches, and possibly a faucet repair kit specific to your faucet model.
5. Q: How do I shut off the water supply to my faucet?
A: Most faucets have individual shut-off valves located beneath the sink. Turn these valves clockwise to shut off the water supply. If there are no valves, you may need to shut off the main water supply to your house.
6. Q: Can I replace a washer to fix a leaky faucet?
A: If you have a compression faucet, replacing the rubber washer inside the valve seat can often solve the leak. However, other faucet types may require different repairs, such as replacing cartridges or O-rings.
7. Q: What should I do if I can’t remove a stuck faucet handle?
A: If the faucet handle is stuck, try using a penetrating oil, such as WD-40, and let it sit for a while. Gently tap the handle with a hammer or use a handle puller tool to help loosen it. If all else fails, seek professional assistance.
8. Q: How can I prevent a faucet from leaking in the future?
A: Regular maintenance is key to preventing faucet leaks. Clean or replace cartridges, washers, and O-rings as needed. Avoid using excessive force when operating the faucet handles, as it can cause damage.
9. Q: Why does my faucet still leak after I’ve replaced the parts?
A: Improper installation, damaged valve seats, or additional worn-out components could cause persistent leaks. It’s essential to ensure proper alignment and tighten all connections correctly. If the problem persists, consult a professional.
10. Q: When should I call a plumber to fix my leaky faucet?
A: If you’re uncertain about the repair process, lack the necessary tools, or have tried basic fixes without success, it’s best to call a plumber. They have the expertise to diagnose and fix more complex faucet issues.
Remember, while these answers provide general guidance, specific faucets may have unique requirements. Always refer to the manufacturer’s instructions or consult a professional if needed.
Summary: Fixing A Leaky Faucet
Don’t let that annoying drip persist any longer! Take action and save water, money, and prevent further damage. With a little effort and a few basic tools, you can fix that leaky faucet and enjoy the peace of mind that comes with an efficiently working plumbing fixture.


