Troubleshooting Garage Door Remote Control Issues

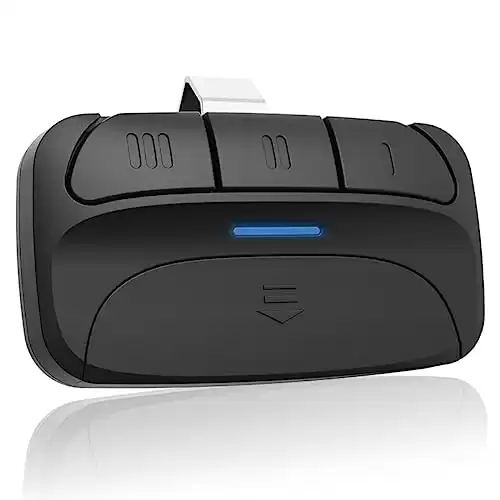
Garage door remote controls have become an integral part of our daily lives, providing convenient access to our homes and ensuring the security of our vehicles and belongings. However, like any electronic device, garage remote controls can encounter problems over time. In this blog, we will explore some common issues with garage remote controls and provide troubleshooting tips and solutions to help you resolve them.
Garage Door Remote Control Common Issues
1. Battery Problems:
Battery-related issues are indeed one of the most prevalent problems encountered with garage remote controls. Understanding how batteries can affect the functionality of the remote control is crucial in troubleshooting and resolving these issues.
When a garage remote control suddenly stops working or becomes unresponsive, it often indicates a battery problem. Over time, batteries can lose their charge or become weak, resulting in insufficient power supply to operate the remote control effectively. This can lead to intermittent signals, reduced range, or complete failure of the remote control.
To address this issue, the first step is to check the batteries. Here’s a step-by-step guide on how to do it:
1. Locate the battery compartment on the back of your remote control. It is usually secured with a small screw or a sliding cover.
2. Use a screwdriver or your fingers to remove the screw or slide open the cover, exposing the battery compartment.
3. Take note of the type and size of batteries required for your remote control. This information can usually be found on the inside of the battery compartment or in the user manual.
4. Remove the old batteries from the compartment, paying attention to their orientation. Some remotes use button cell batteries, so ensure you insert the new batteries with the correct polarity (+/-) in mind.
5. Insert fresh batteries of the appropriate type and size into the compartment, aligning them according to the indicated polarity.
6. Replace the battery compartment cover or secure it with the screw, ensuring it is tightly closed.
Once you have replaced the batteries, test the functionality of the remote control by pressing the buttons and observing if it triggers the garage door opener. If the remote control now operates smoothly and without any issues, the problem was likely due to weak or depleted batteries.
However, if the remote control still does not work or remains unresponsive, there might be other underlying causes. In such cases, it is recommended to consult the manufacturer’s instructions or contact customer support for further assistance. They can provide specific troubleshooting steps or suggest additional solutions to address the problem.
The type of batteries needed for garage door remote controls can vary depending on the specific model and brand of the remote control. The most common type of battery used in garage remote controls is the coin or button cell battery.
The specific coin or button cell battery required for a garage door remote control is typically indicated on the device itself or in the user manual. Some common battery types used in garage remote controls include:
1. CR2032: This is a popular coin cell battery size commonly used in various electronic devices, including garage remote controls. It has a diameter of approximately 20mm and a thickness of 3.2mm.
2. CR2025: Another commonly used coin cell battery, the CR2025 has a diameter of around 20mm and a thickness of 2.5mm. It is also compatible with many garage remote controls.
3. CR2016: This coin cell battery has a diameter of approximately 20mm and a thickness of 1.6mm. It is less common than the CR2032 or CR2025 but may still be used in some garage remote controls.
If you’re unsure about the battery type needed for your garage door remote control, consult the manufacturer’s instructions or contact their customer support for accurate information and guidance.
2. Range Limitations:
Range limitations in garage remote controls can indeed be frustrating, especially when you expect seamless access from a distance. The typical range of a garage remote control is generally between 50 to 100 feet (15 to 30 meters). Let’s explore the causes of limited range and how to address them:
1. Interference from other electronic devices:
Other electronic devices operating on similar frequencies, such as wireless routers, cordless phones, or even nearby garage door openers, can interfere with the signal of your remote control. This interference can reduce the effective range. To overcome this, try eliminating potential sources of interference by turning off or relocating such devices away from the garage area.
2. Physical obstructions:
Physical obstacles between the remote control and the garage door can significantly impact the signal strength and range. Common obstructions include walls, trees, or metal objects. Make sure there are no large objects blocking the direct line of sight between the remote control and the garage door. Clearing any obstructions can help improve the range of the remote control.
3. Weak batteries:
As mentioned earlier, weak or depleted batteries can cause range limitations. Ensure that the batteries in your remote control are fresh and fully charged. Replace them if necessary, following the recommended battery type and insertion instructions provided by the manufacturer.
4. Antenna position:
Some garage remote controls have external antennas that require proper positioning for optimal signal transmission. Check if your remote control has an adjustable antenna and experiment with different positions to find the best signal reception. Extending the antenna fully and positioning it vertically often helps enhance the range.
5. Reprogramming or resetting the remote control:
In some cases, reprogramming or resetting the remote control can improve its range. Refer to the manufacturer’s instructions or user manual for the correct procedure. This process typically involves clearing the remote control’s memory and re-syncing it with the garage door opener.
6. Upgrade to a more powerful remote control:
If you have tried the above steps and are still experiencing range issues, it may be worth considering upgrading to a remote control with a stronger transmitter or enhanced range capabilities. Consult with the manufacturer or a professional garage door technician to explore options that better suit your needs.
By addressing potential sources of interference, eliminating physical obstructions, ensuring battery strength, adjusting antenna positioning, and considering upgrades if necessary, you can mitigate range limitations and enjoy the convenience of controlling your garage door from a more significant distance.
3. Signal Interference:
Interference from neighboring garage doors or nearby electronics can cause signal problems with your remote control. If your remote control operates sporadically or triggers other garage doors in the vicinity, you can attempt to change the frequency or reprogram the remote. Consult the manufacturer’s instructions or contact customer support for guidance on how to change the frequency settings.
4. Programming and Syncing Issues:
When your garage door remote control becomes out of sync with the garage door opener, it can lead to frustration and inconvenience. However, this issue is relatively common and can often be resolved by reprogramming the remote control to sync it with the opener. Here’s a more detailed explanation of how to tackle this problem:
1. Accidental reset or altered programming:
Remote controls can occasionally become out of sync if they are accidentally reset or if the programming of the garage door opener is modified. This can happen due to various reasons, such as a power outage or inadvertent button presses. When this occurs, the remote control loses its ability to communicate effectively with the garage door opener.
2. Consult the instruction manual or manufacturer’s website:
To rectify the syncing issue, the first step is to refer to the instruction manual that came with your remote control or visit the manufacturer’s website for guidance. These resources typically provide detailed instructions on how to reprogram the remote control and sync it with the garage door opener. Ensure you have the correct manual or consult the specific model’s information on the manufacturer’s website.
3. Follow the correct programming procedure:
The programming procedure for re-syncing the remote control with the opener may vary depending on the specific brand and model. However, in most cases, it involves simultaneously pressing specific buttons on the remote control and the opener to establish the connection between the two devices.
4. Sequential button pressing:
Typically, the programming procedure requires a specific sequence of button presses on both the remote control and the opener. This sequence may involve pressing a particular button on the opener followed by pressing a corresponding button on the remote control within a specified timeframe. Following the correct sequence and timing is crucial for successful syncing.
5. LED indicators or audible signals:
Some remote controls and garage door openers have LED indicators or emit audible signals during the programming process to indicate successful syncing. Pay attention to these indicators to ensure that the synchronization is completed correctly.
6. Test the remote control:
After completing the programming procedure, test the remote control by pressing its buttons and observing if it triggers the garage door opener. If the garage door responds as expected, it indicates that the remote control has been successfully synced with the opener.
5. Physical Damage:
Accidents happen, and sometimes your garage remote control can be dropped, exposed to moisture, or subject to other physical damage. This can result in malfunctioning buttons, unresponsive controls, or even a broken remote casing. If your remote control shows signs of physical damage, it may need to be repaired or replaced. Check with the manufacturer for repair options or consider purchasing a new remote control.
How to Program Garage Door Remote Controls
1. Rolling Code Garage Door Remote Control:
– Locate the “Learn” or “Smart” button on the garage door opener unit.
– Press and release the “Learn” button. The LED indicator on the opener should light up or blink.
– Within a specified timeframe, press and release the desired button on the remote control to be programmed.
– The LED indicator on the opener should flash or turn off to indicate successful programming.
– Test the remote control by pressing the programmed button to operate the garage door.
2. Dip Switch Garage Remote Control:
– Open the remote control’s battery compartment to access the dip switches.
– Compare the dip switch settings on the remote control with those on the garage door opener receiver.
– Use a small screwdriver or your finger to adjust the dip switches on the remote control to match those on the receiver.
– Once the dip switches are set to the same pattern, close the battery compartment.
– Test the remote control by pressing the appropriate button to operate the garage door.
3. Keypad Entry System:
– Enter the manufacturer-provided programming code or your own personalized code into the keypad.
– Look for a “Learn” or “Smart” button on the garage door opener unit.
– Press and release the “Learn” button. The LED indicator on the opener should light up or blink.
– Within a specified timeframe, enter your desired PIN code into the keypad.
– The LED indicator on the opener should flash or turn off to indicate successful programming.
– Test the keypad entry system by entering your PIN code and operating the garage door.
4. Homelink Garage Door Remote Control (Built-in Vehicle System):
– Refer to your vehicle’s owner’s manual for specific instructions on programming the Homelink system.
– Typically, you need to press and hold a specific Homelink button in the vehicle.
– While holding the button, point the original remote control towards the Homelink system and press the desired button on the remote control.
– The Homelink indicator should flash or turn off to indicate successful programming.
– Test the Homelink system by pressing the programmed button to operate the garage door.
Please note that these are general programming instructions, and specific steps may vary based on the manufacturer and model of your remote control or garage door opener. It’s essential to consult the instruction manual provided by the manufacturer or visit their website for accurate and detailed programming procedures for your specific system.
How to Reset Garage Door Remote Control
To reset a garage door remote control, you can follow these general steps:
1. Locate the “Learn” or “Smart” button on the garage door opener unit. It is usually located near the antenna wire or on the back panel.
2. Press and hold the “Learn” button for approximately 6-10 seconds. The LED indicator on the opener may turn on, blink, or change its pattern during this time.
3. Release the “Learn” button once you observe a change in the LED indicator or after the specified duration.
4. On the garage door remote control, press and release the desired button that you wish to reprogram or reset.
5. The LED indicator on the garage door opener should respond by flashing, turning off, or changing its pattern again, indicating that the remote control has been successfully reset.
6. Test the remote control by pressing the reset button. The garage door should respond to the command, indicating that the reset process was successful.
Here are 10 frequently asked questions (FAQs) about garage remote controls:
1. How do I know if my garage remote control needs a new battery?
If your garage remote control becomes unresponsive, doesn’t work consistently, or has a weak signal, it’s a good indication that the battery needs to be replaced. Try replacing the battery and see if the issue is resolved.
2. Can I use any type of battery for my garage remote control?
It’s best to use the type of battery recommended by the manufacturer for your specific remote control model. Consult the user manual or check the manufacturer’s website for the appropriate battery type.
3. My garage remote control range has decreased. What can I do?
Range issues can occur due to interference or physical obstructions. Try eliminating potential sources of interference, such as wireless routers or cordless phones, and ensure there are no physical barriers between the remote and the garage door.
4. How can I change the frequency of my garage remote control?
Changing the frequency of a garage remote control typically involves reprogramming it to match the frequency of the garage door opener. Consult the manufacturer’s instructions or contact customer support for guidance on changing the frequency settings.
5. Why does my garage remote control sometimes trigger other garage doors nearby?
Signal interference from neighboring garage doors or nearby electronics can cause this issue. Changing the frequency of your remote control can help resolve the problem. Refer to the manufacturer’s instructions for the correct procedure.
6. Can I reprogram my garage remote control myself?
Yes, in most cases, you can reprogram your garage remote control yourself. Refer to the instruction manual or the manufacturer’s website for the correct programming procedure. It typically involves pressing specific buttons on the remote and the opener simultaneously.
7. My garage remote control stopped working after a power outage. What should I do?
Power outages can sometimes affect the programming of garage remote controls. Try reprogramming the remote control by following the manufacturer’s instructions. If that doesn’t work, you may need to contact customer support for further assistance.
8. Can I repair a damaged garage remote control?
It depends on the extent of the damage. Some minor issues, like unresponsive buttons, can be fixed by cleaning the remote control or replacing the button pad. However, if the remote control is severely damaged, it may need to be replaced.
9. How often should I replace the battery in my garage remote control?
The lifespan of the battery can vary depending on usage. As a general guideline, it is recommended to replace the battery every 1-2 years or when you notice signs of diminished performance.
10. Where can I purchase a replacement garage remote control?
You can purchase replacement garage remote controls from various sources, including hardware stores, online retailers, or directly from the manufacturer. Make sure to provide the model and brand information to ensure compatibility.
Garage door remote controls offer convenience and security for homeowners, but they can encounter issues that require troubleshooting. By addressing common problems like battery issues, range limitations, signal interference, programming, and physical damage, you can often resolve the issues yourself and restore the functionality of your garage remote control. However, if the problem persists or if you are unsure about how to proceed, it’s always recommended to consult the manufacturer’s instructions or seek professional assistance. With a little patience and effort, you can ensure that your garage remote control continues to provide seamless access to your home and garage.

