Choosing the Right Size Nails for Framing: Guide
Understanding the Importance of Nail Size in Framing Projects
When it comes to framing projects, selecting the right size nails is key. The size of the nails you choose can greatly impact the structural integrity and longevity of your construction. In this guide, we will delve into the significance of nail size in framing and provide you with information to make informed decisions.
The Basics of Framing Nails and Their Role in Construction
Before we dive into nail sizes, let’s familiarize ourselves with framing nails and their role in construction. Framing nails are specifically designed to provide strength and durability to structural components. They are typically larger and stronger than regular nails, making them ideal for framing applications.
Nail Sizing: The Key Factors to Consider in Framing
Choosing the right nail size involves considering several key factors. The most important considerations include material thickness, structural requirements, and the intended application. By understanding these factors, you can ensure that your chosen nails provide adequate holding power and prevent any potential structural issues.
Types of Nails for Framing: Which Ones to Choose?
When it comes to framing, different types of nails are available, each with its own set of advantages and disadvantages. Let’s explore some common types of nails used in framing projects:
Common Types of Nails Used in Framing Projects
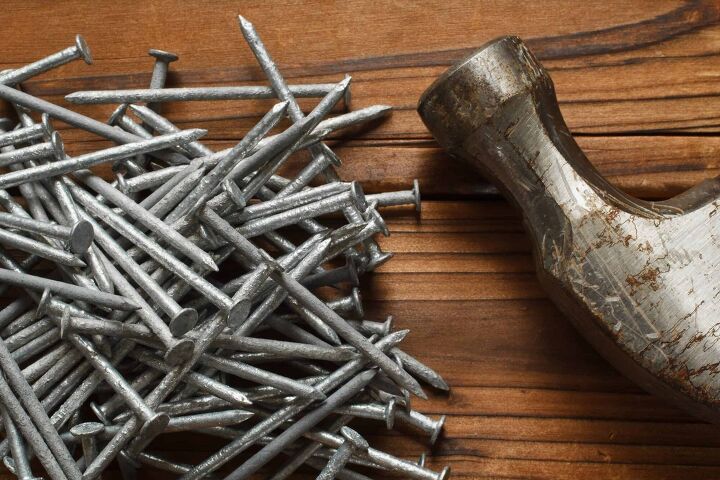
1. Common Nails: These traditional nails are widely used in framing due to their affordability and versatility. They come in various sizes and are suitable for general framing applications.
2. Box Nails: Box nails are thinner and have a smaller diameter compared to common nails. They are ideal for situations where splitting of wood is a concern, such as when working with hardwoods or thinner lumber.
3. Duplex Nails: Duplex nails are double-headed, making them easy to remove if necessary. They are commonly used in temporary construction or when disassembly may be required.
4. Ring-Shank Nails: These nails have ridges along their shank, providing improved holding power. Ring-shank nails are particularly useful in areas prone to high winds or seismic activity.
The Pros and Cons of Common Framing Nail Types
Now that we have discussed some common framing nail types, it’s essential to understand their pros and cons. This knowledge will help you determine which nail type suits your project best.
1. Common Nails: Pros – widely available, affordable; Cons – may cause wood splitting, lower holding power compared to other types.
2. Box Nails: Pros – less likely to split wood, suitable for thinner lumber; Cons – may have reduced holding power compared to thicker nails.
3. Duplex Nails: Pros – easy to remove, suitable for temporary constructions; Cons – may have reduced holding power due to their design.
4. Ring-Shank Nails: Pros – excellent holding power, suitable for high-wind areas; Cons – more challenging to drive into hard materials, may require pre-drilling.
H3: Exploring Alternative Fasteners for Framing Projects
While nails are commonly used in framing, alternative fasteners can also be considered. Some alternatives to nails:
1. Screws: Screws provide excellent holding power and can be easily removed if needed. They are suitable for certain framing applications, but their cost and installation time may be higher compared to nails.
2. Structural Screws: Designed specifically for structural applications, these screws offer superior strength and holding power. They are an excellent alternative in situations where additional strength is required.
3. Timberlok Screws: These screws are specifically designed for connecting wood to wood. They have a large shank diameter, providing exceptional
holding power in framing projects.
4. Bolts and Nuts: In some cases, such as heavy-duty or load-bearing constructions, bolts and nuts can be used instead of nails. They provide superior strength and durability but require more time and effort to install.
Selecting the Right Size Nails for Framing: Factors to Consider
Now that we have explored different nail types and alternatives, let’s focus on selecting the right nail size for your framing project. Several factors come into play when determining the appropriate nail size. These factors include material thickness, structural considerations, and grip strength.
Understanding the Relationship Between Nail Size and Material Thickness
One of the factors in choosing nail size is the thickness of the materials you are working with. The nail should be long enough to penetrate the framing members fully and provide adequate holding power. Here are some general guidelines:
1. For 2×4 framing members: Use nails with a length of 3 inches or longer.
2. For 2×6 framing members: Opt for nails with a length of 3 1/2 inches or longer.
3. For thicker materials or multiple layers: Increase the nail length accordingly.
It’s important to consult local building codes and regulations to ensure compliance with specific requirements in your area.
Structural Considerations: Nail Length and Holding Power
Another factor to consider is the structural requirements of your framing project. Different applications may have specific needs in terms of holding power. For load-bearing structures or areas prone to high wind or seismic activity, longer nails with increased holding power may be necessary.
Nail Shank Diameter: Its Impact on Structural Integrity
Apart from nail length, the shank diameter also plays a role in the structural integrity of your framing. Thicker shank diameters generally provide increased holding power. However, it’s essential to ensure that the nail shank diameter does not exceed the thickness of the framing members, as this could cause splitting or other issues.
Grip Strength: The Importance of Nail Gauge in Framing
Nail gauge refers to the thickness of the nail. The higher the gauge number, the thinner the nail. When it comes to framing, it’s generally recommended to use thicker gauge nails for increased grip strength. Thicker nails have a higher resistance to bending or pulling out, providing greater stability to your construction.
Here are the top 10 frequently asked questions related to nail sizing for framing, along with their respective answers:
1. Q: What size nails should I use for framing?
A: The size of nails for framing depends on various factors such as material thickness, structural requirements, and local building codes. Generally, for 2×4 framing members, nails with a length of 3 inches or longer are recommended, while 2×6 framing members may require nails with a length of 3 1/2 inches or longer. It’s important to consult local building codes and regulations for specific requirements in your area.
2. Q: How do I determine the appropriate nail length for my framing project?
A: To determine the appropriate nail length for framing, consider the thickness of the materials you are working with. The nail should be long enough to penetrate the framing members fully and provide adequate holding power. Guidelines suggest using longer nails for thicker materials or multiple layers. It’s essential to consult local building codes and regulations for specific requirements.
3. Q: Can I use nails of different sizes in the same framing project?
A: While it is generally recommended to use nails of the same size throughout a framing project, there may be situations where using different nail sizes is appropriate. However, it’s important to ensure that each nail size chosen is suitable for the specific application and meets the structural requirements of the project.
4. Q: What happens if I use the wrong size nails for framing?
A: Using the wrong size nails for framing can lead to structural issues and compromised stability. If the nails are too short, they may not provide sufficient holding power, resulting in weak connections. On the other hand, using nails that are too long can risk splitting the wood or causing damage to the materials. It’s crucial to choose the appropriate nail size to ensure the integrity of the framing structure.
5. Q: Are there any alternative fasteners to nails for framing?
A: Yes, there are alternative fasteners to nails for framing projects. Screws, such as structural screws or timberlok screws, can provide excellent holding power and are easy to remove if needed. Bolts and nuts can also be used in heavy-duty or load-bearing constructions. However, the choice of alternative fasteners depends on the specific requirements of the project and the materials being used.
6. Q: Are there specific nail size requirements outlined in local building codes?
A: Yes, local building codes often outline specific nail size requirements for framing projects. These codes ensure that constructions meet safety and structural standards. It is essential to consult the relevant building codes in your area to determine the specific nail size requirements and ensure compliance with the regulations.
7. Q: How do I know if the nail size I’m using meets structural requirements?
A: To determine if the nail size meets structural requirements, it’s advisable to consult engineering guidelines, building codes, or consult with professionals in the construction industry. They can provide expert advice based on the specific project requirements, material types, and load-bearing considerations.
8. Q: Can I use screws instead of nails for framing?
A: Yes, screws can be used as an alternative to nails for framing. Screws provide excellent holding power and can be easily removed if necessary. However, it’s important to consider the cost, installation time, and specific requirements of the project when deciding between nails and screws for framing.
9. Q: Are there any safety considerations when using nails for framing?
A: When using nails for framing, it’s important to follow proper safety precautions. Wear appropriate safety gear, such as protective eyewear and gloves, to prevent injuries. Ensure the stability of the work surface and use caution while handling tools to avoid accidents. Additionally, be mindful of proper hammering techniques to prevent misfires or potential injuries.
10. Q: How do I prevent nails from splitting wood during framing?
A: To prevent nails from splitting wood during framing, consider pre-drilling pilot holes, especially when working with hardwoods or near the edges of the material. Using nails with a smaller diameter, such as box nails, can also reduce the likelihood of splitting. Additionally, avoiding excessive force or overdriving the nails can help prevent splitting and damage to the wood.
Here’s a list of the tools commonly used for framing:
1. Tape Measure: A tape measure is crucial for accurately measuring the dimensions of the framing materials and determining the appropriate nail length.
2. Hammer: A reliable hammer is necessary for driving the nails into the framing members. Choose a hammer with a comfortable grip and a weight suitable for your needs.
3. Nail Gun: While not mandatory, a nail gun can greatly speed up the framing process and provide consistent nail placement. Nail guns are available in different types, such as pneumatic or cordless, so choose one that suits your preferences and project requirements.
4. Drill and Drill Bits: A drill is useful for pre-drilling pilot holes to prevent wood splitting, especially when working with hardwoods or near the edges of the material. Make sure to have drill bits appropriate for the size of the pilot holes required.
5. Safety Gear: Safety should always be a priority when working with tools. Wear safety glasses to protect your eyes from flying debris, and consider wearing work gloves to shield your hands from potential injuries.
6. Level: A level is helpful for ensuring that your framing is straight and plumb. It ensures accurate placement of the nails and contributes to the overall structural integrity of the project.
7. Pliers or Nail Set: Pliers or a nail set can be handy for countersinking nails slightly below the surface of the wood. This allows for the application of putty or filler, creating a smooth finish.
8. Speed Square or Framing Square: A speed square or framing square helps with marking and measuring angles, ensuring precise cuts and accurate nail placement.
9. Carpenter’s Pencil: A carpenter’s pencil, with its flat shape, is ideal for marking measurements and lines on the framing materials.
10. Chalk Line: A chalk line is useful for marking long, straight lines on the framing materials, helping to ensure accurate placement and alignment of the framing components.
Remember to always prioritize safety, use the appropriate tools for the job, and consult professional advice or local building codes when necessary.


